Setting up Zendesk integration for the Status Tracking plugin is pretty straightforward, but will involves a few key steps. First ensure you have Ultimate Status Tracking installed and activated.
 Install Ultimate Status Tracking – WordPress Plugin
6,000+ Installations
Next, follow the instructions below to set up your Status Tracking-Zendesk Integration.
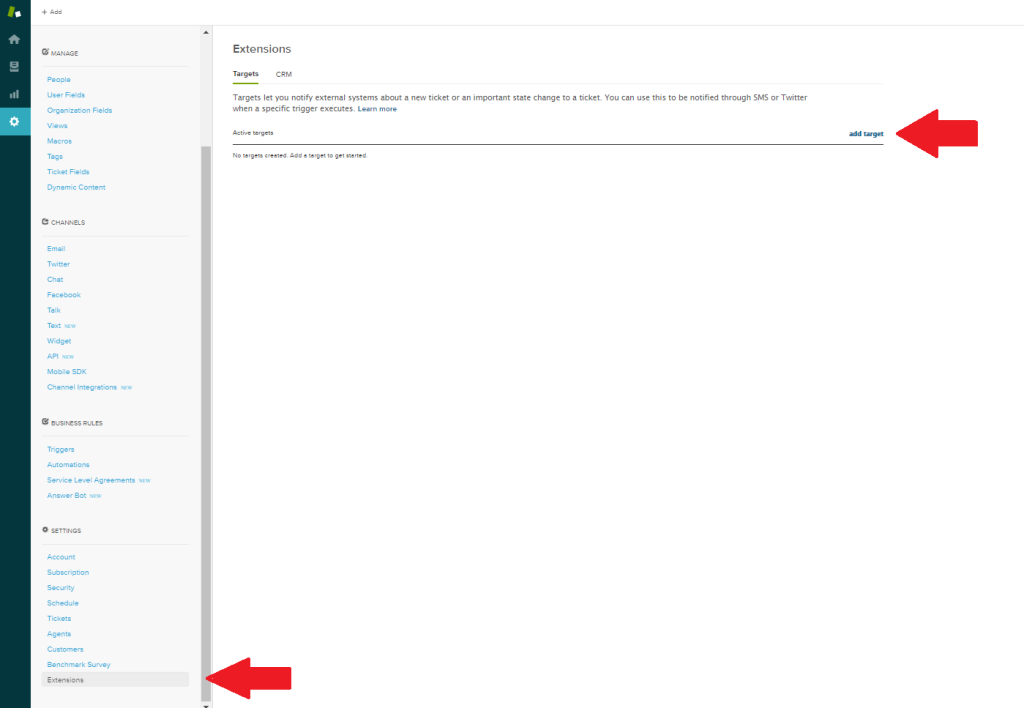
Step 3: Select the “HTTP target” option from the list of available options. Enter a title (ex. Status Tracking ticket created), leave the method as “GET” and the “Basic Authentication” box unchecked. Next, for the URL enter the following:http://example.com?Action=Zendesk_Order_CreatedBe sure to replace example.com with the URL of your website. Next, change the dropdown box from “Test Target” to “Create Target” and click the “Submit” button.
Step 4: Go back to the “Extensions” menu item and then click the “add target” link again. Select the “HTTP target” option from the list of available options. Enter a title (ex. Status Tracking ticket updated), leave the method as “GET” and the “Basic Authentication” box unchecked. Next, for the URL enter the following:http://example.com?Action=Zendesk_Order_UpdatedBe sure to replace example.com with the URL of your website. Next, change the dropdown box from “Test Target” to “Create Target” and click the “Submit” button.
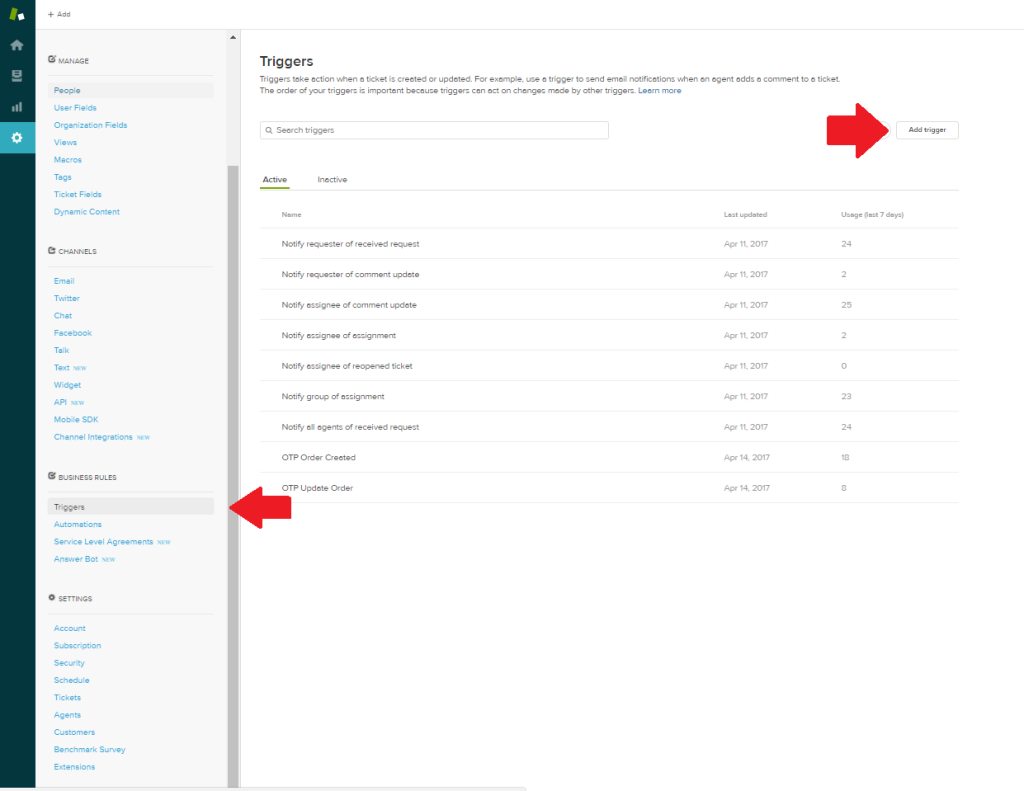
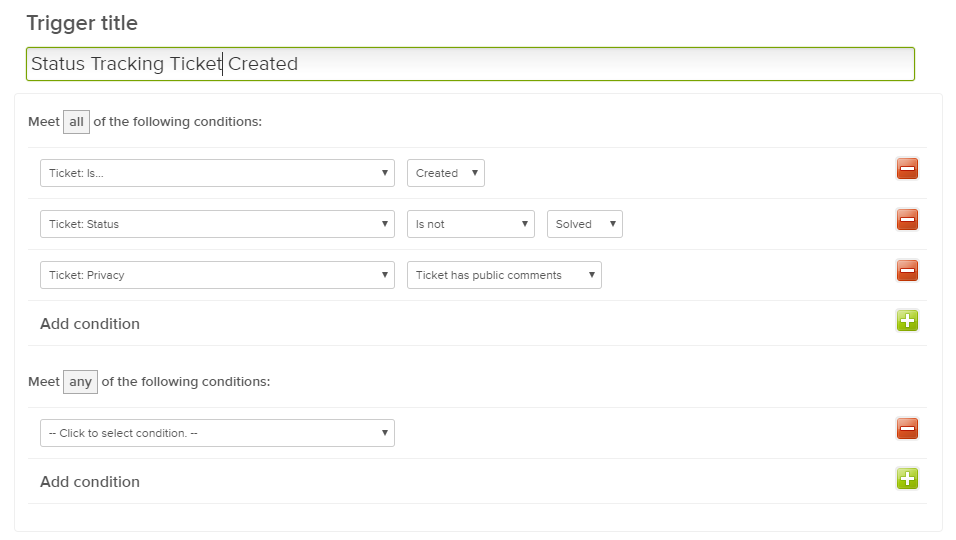
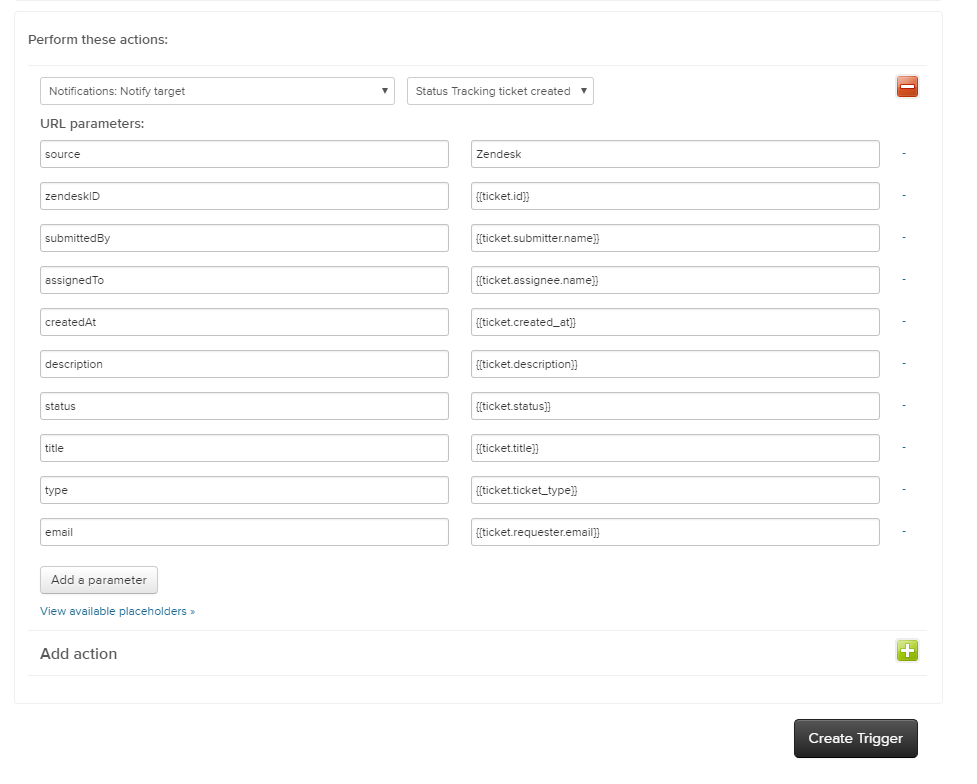
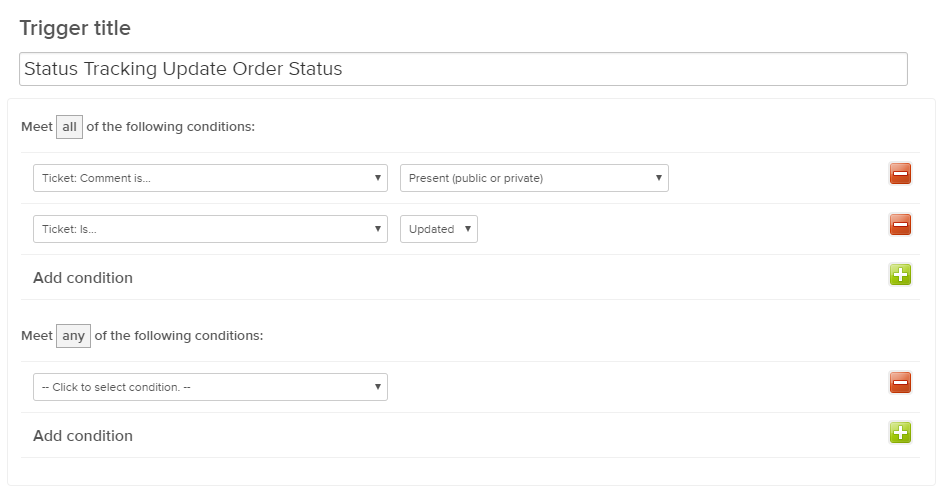

That’s it!
There should now be an order created each time a ticket is submitted to you via Zendesk, and the status of that ticket should automatically update on your website tracking form each time you update the status of the ticket via Zendesk.


