Starting with version 5.0.0 of Ultimate Product Catalog, everything that displays on the front end of the plugin can be customized by creating your own template files (to modify and/or overwrite the existing templates files), which can be done as per the following:
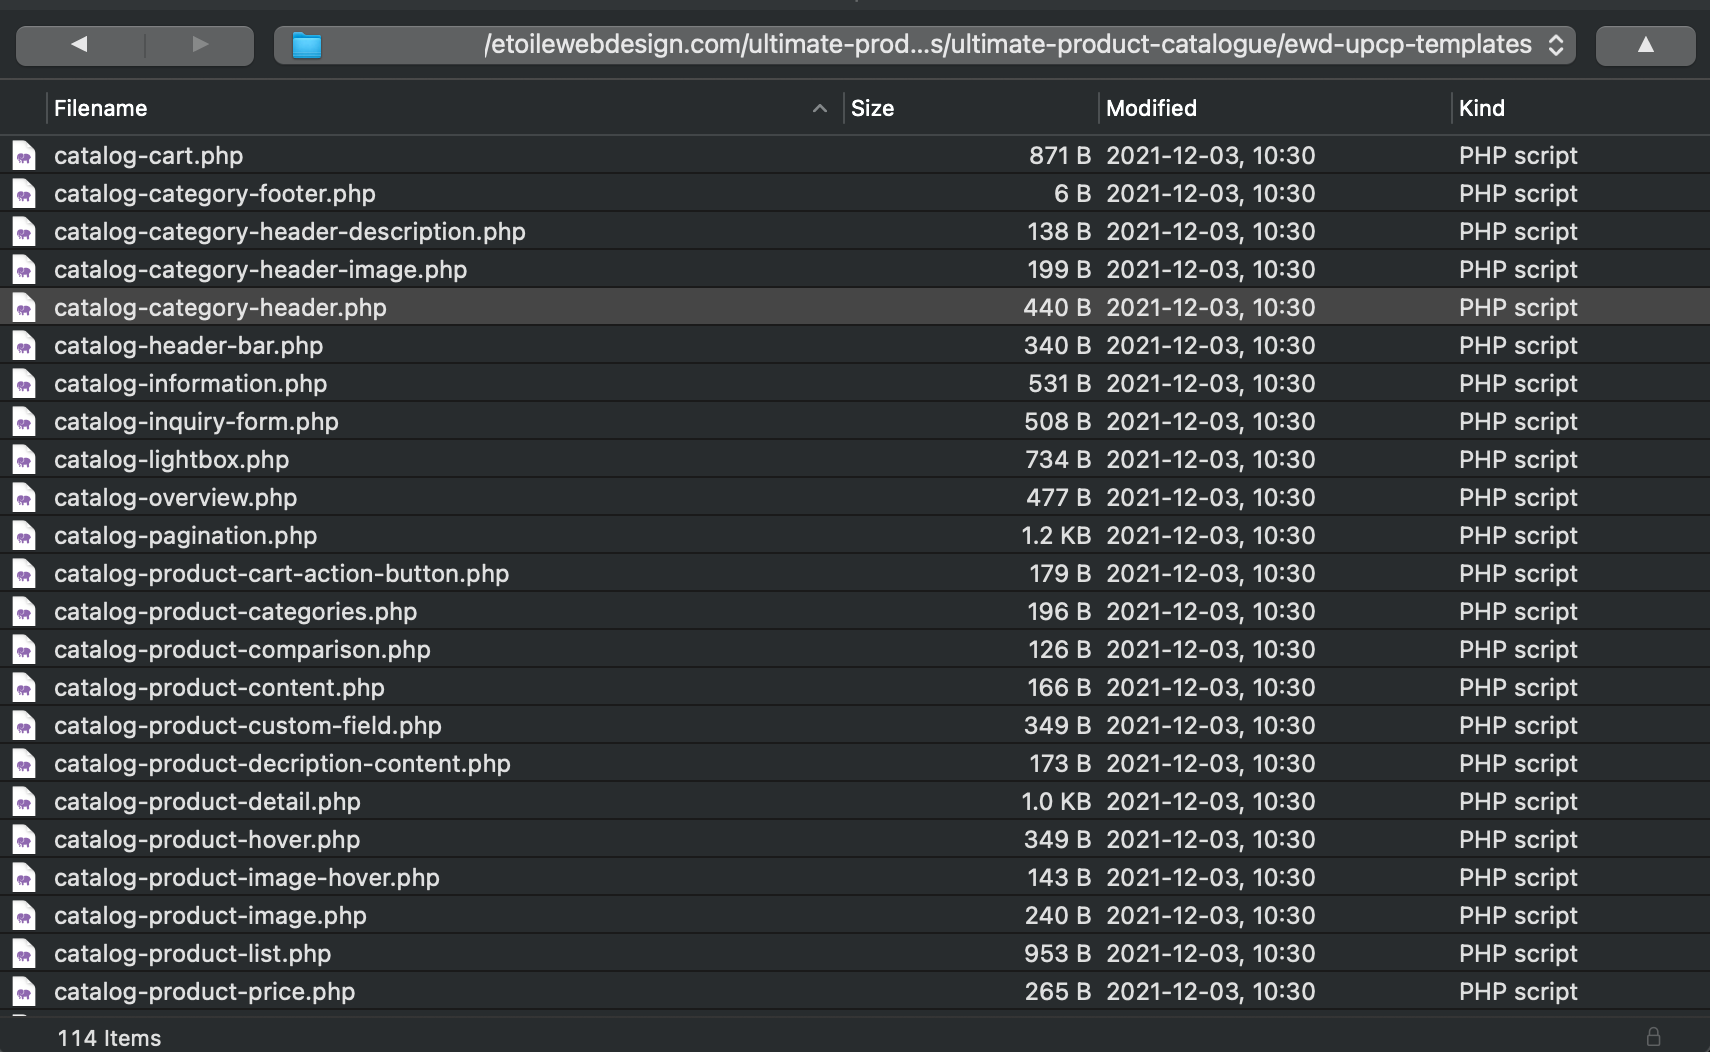
- To get started, you should have FTP access to your server (in the screenshots below, we’re using Cyberduck), so that you can download and upload files to your WordPress installation. Navigate to the templates folder for the plugin that you’re editing. For Ultimate Product Catalog, you would click on wp-content > plugins > ultimate-product-catalogue > ewd-upcp-templates.
- Next, find the template that you want to edit. In our case, we’re going to add the label Category: before the category headings on the catalog page. To do this, we’ll download the catalog-category-header template to our desktop.
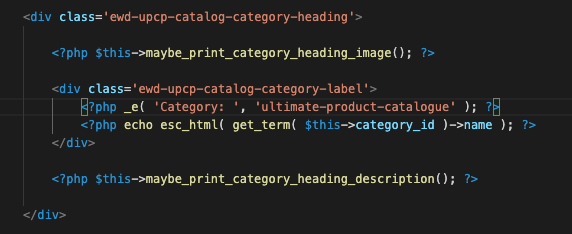
- Open up the file that you downloaded. You should see the HTML div that contains the structure, along with where the label is being added. We’ll add in our changes and then save that file.
- Now we need to add that file to our server. Navigate to the child theme you’re using, or your active theme if you’re not using a child theme, and create a folder with the same name as the templates folder in the plugin, so ewd-upcp-templates in our case.
- Upload the file you edited to that folder. The plugin will automatically use any templates with the same names found in your active theme’s folder. Once you’ve done that, you should see the modified label on the catalog page.
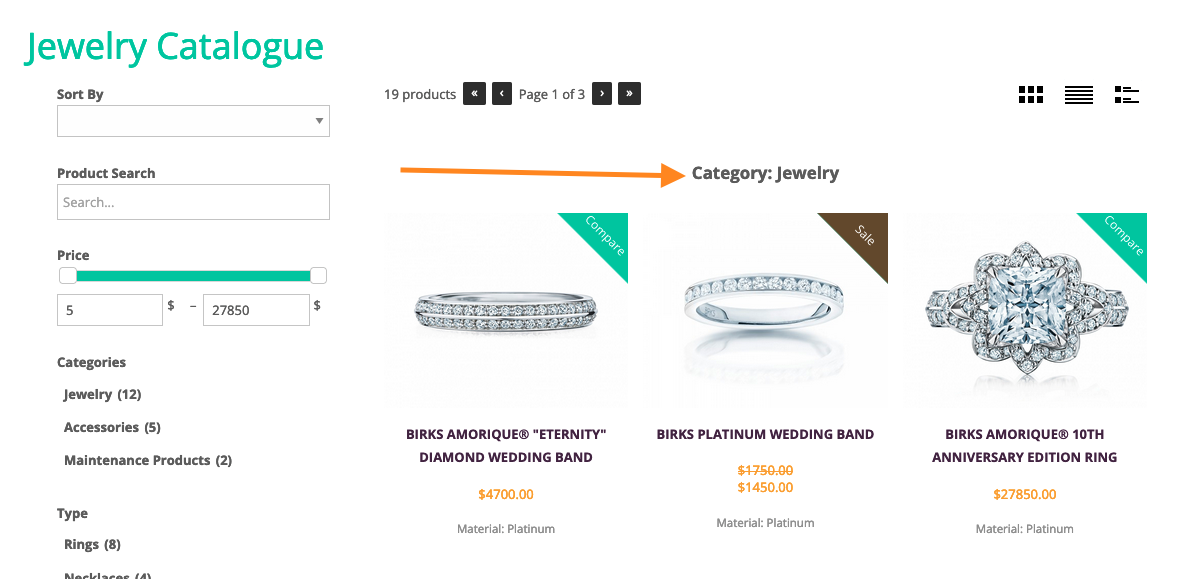
That’s all it takes to edit or change any of the content displayed on the front end by Ultimate Product Catalog!
